
Weaber Lumber Weathered Hardwood Board Wall
Helllllllo Long lost friends! It has been quite some time since I have put up a post. I have been MIA and itching to get back to blogging. So where have I been? Well, you all know I opened up a repurposed furniture and home decor shop (called Always Never Done) and business has been booming! I haven’t had a moment to catch my breath but low and behold the blogging bug was creeping up on me. So here I am, happy to be back. Going to try my best to juggle both the shop and blogging, not because I have to but because I want to!
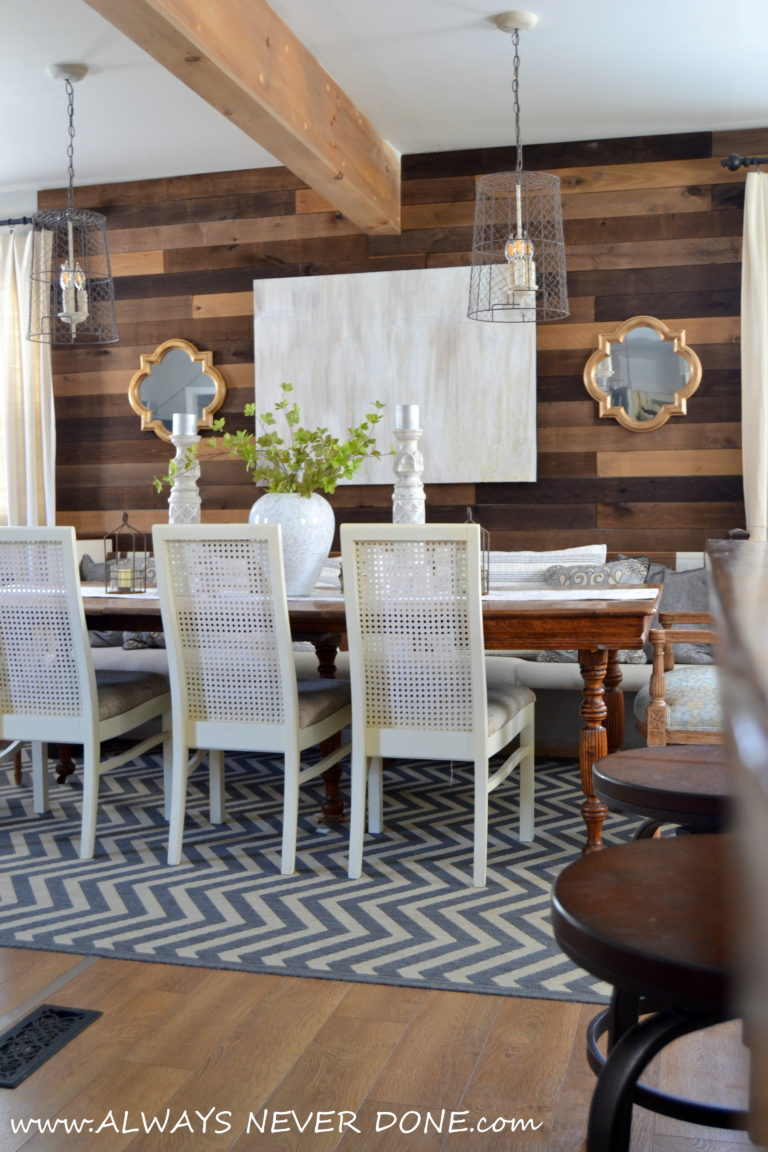
So while I was juggling all the new ventures of opening a shop I was still updating my home and changing things around like I always do. One of those big changes came when Weaber Lumber challenged me to use their awesome Weathered Harwood boards. They provided me with a few packs of these mixed wood boards and I arranged them and put them up on one of my drab walls to create a focal wall. I transformed my wall from grey to awesomeness!

*This post contains links from Weaber Lumber. I received the product in exchange for my own thoughts and opinions on this product:)
Each Weaber Weathered Wall Board bundle contains enough material to cover 10.5 square feet and they can be bought at Home Depot here and look similar to this.


I had to measure my space and figure out how many bundles I needed and what layout did I want to do with the boards. I chose to use a staggered layout for my wall.
I prepped my wall and made sure everything was clean and dry. I started at the top and worked my way down. (I had a very level straight wall so starting at the top wall great for me. Some walls are not 100% straight across so following the line at your ceiling may end up in a not so straight look. Just make sure you are straight:)
First things first. You have to pick which color board you want use first. There are a few of each color tone of wood in each bundle. Then I used construction glue on the back of the board and pressed it against my wall.

Then I used my pneumatic nail gun to nail the piece to the wall.

At some point you will have to cut some of the boards to fit into your space. I had my saw all set up in the garage and ready to go so that I could measure, cut, glue, nail. Measure, cut, glue, nail. (Please remember to use your safety glasses, ear plugs and a mask (if necessary) when using these tools) And please ignore that my shirt is on inside out That’s just how I roll some days.

Keep this up and before you know it your space will be coming along very quickly. It took me 2 hours by myself to do this accent wall.

That’s all there is to it folks. Now I have this gorgeous wall that smacks you in the face as soon as you walk in our front door. I think it really richens up the space. Don’t you?
So 2 hours later and maybe $100 created this look. Pretty intense right!
Have a beautiful week friends!! See you soon!